
Good news! If it has broken closer to carabiner, you can fix it yourself.
To get started you will need to have access to the tether. You can disassemble your sensor by:
1) Take out the top screws with an Allen wrench
2) Use a USB cable to push down the charging port and pull up the case
3) Disconnect wires
4) Lift rest of unit from the base to access tether
How to disassemble your sensor:
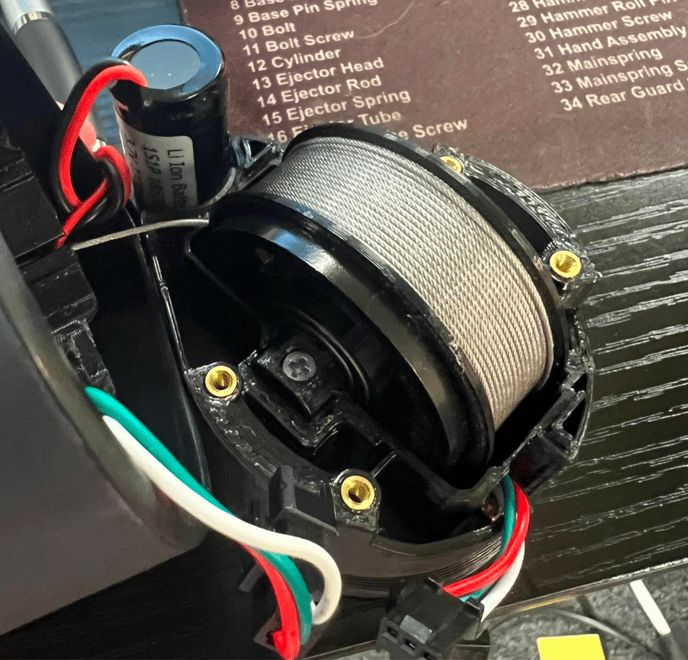
5) Open the unit by taking off the top chassis (part with the green board on it) and unplugging the wires connected from the PCB (green board) to the battery and switch.
6) After doing this, you will see a spindle that should have the tether still somewhat wrapped around it. The spindle has an axel that is connected to the spring and controls the tension in the unit.
7) Unscrew the axel and carefully take it out from the bottom chassis.
8) Take the axle off of the spindle and set it to the side. The next step is to unwind/ untangle the wire from the spindle completely.
9) After doing so, starting at the hole that the tether comes out of, you will hand-spin the tether back onto the spindle. It is important to keep the tether very tight and neatly fit into the spindle. Once it is spun, you will wrap it twice, tightly with a rubber band. It should look something like this:
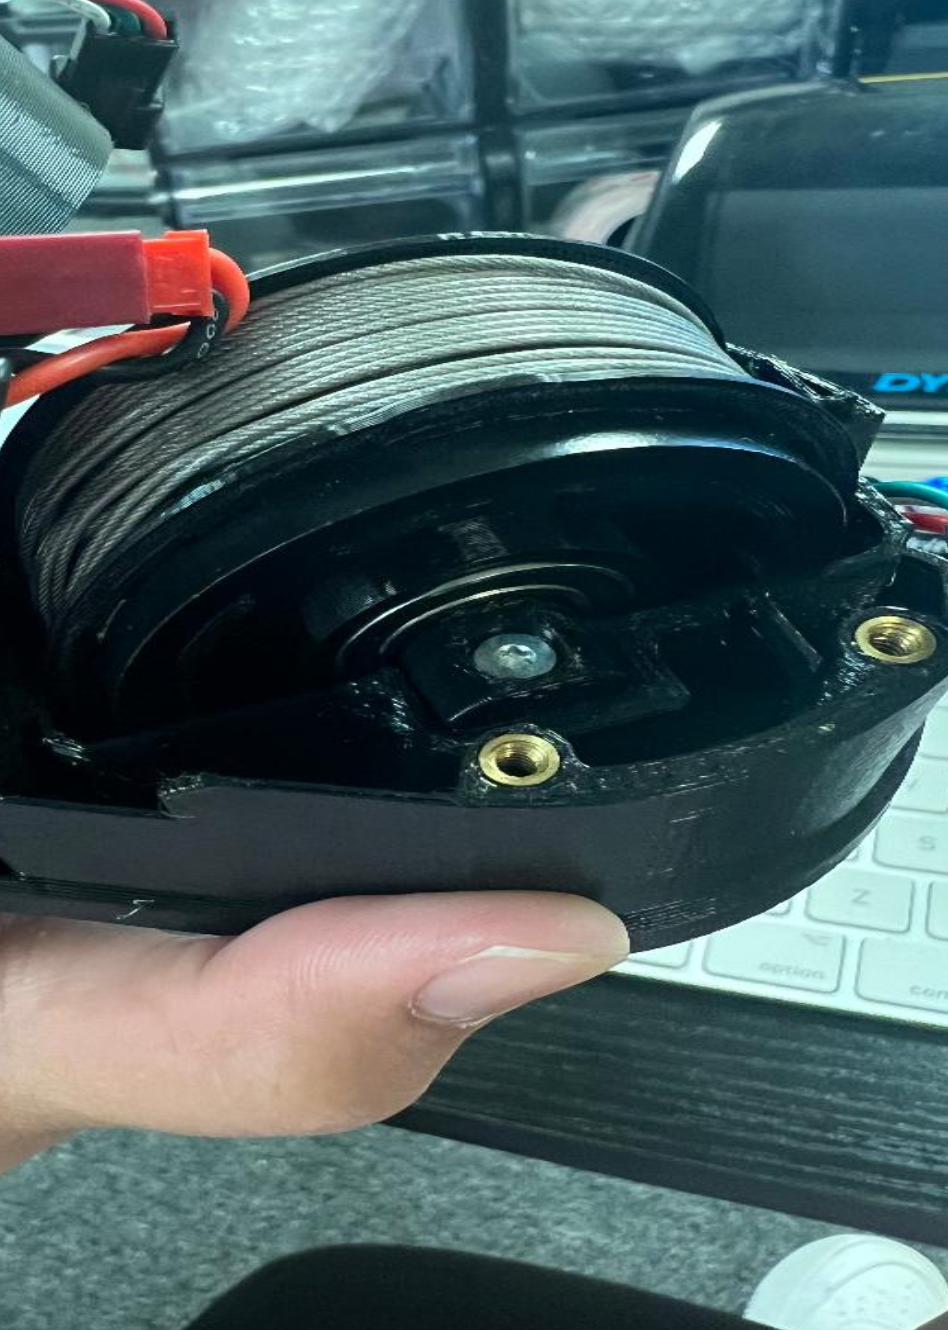
Make sure that the side of the spindle with the magnet is facing the left and the flat side is facing the right. After doing this, you will put the axle back into the spindle by grabbing the straight part of the spring inside of the hole and inserting it into the space in the middle of the axel.
The side of the axle with the circular hole that holds the screw will be on the left. After the axle is in the spindle you can place the axle back into its position on the chassis bottom. Ensure that the side of the axle with the bigger hole is facing upwards.
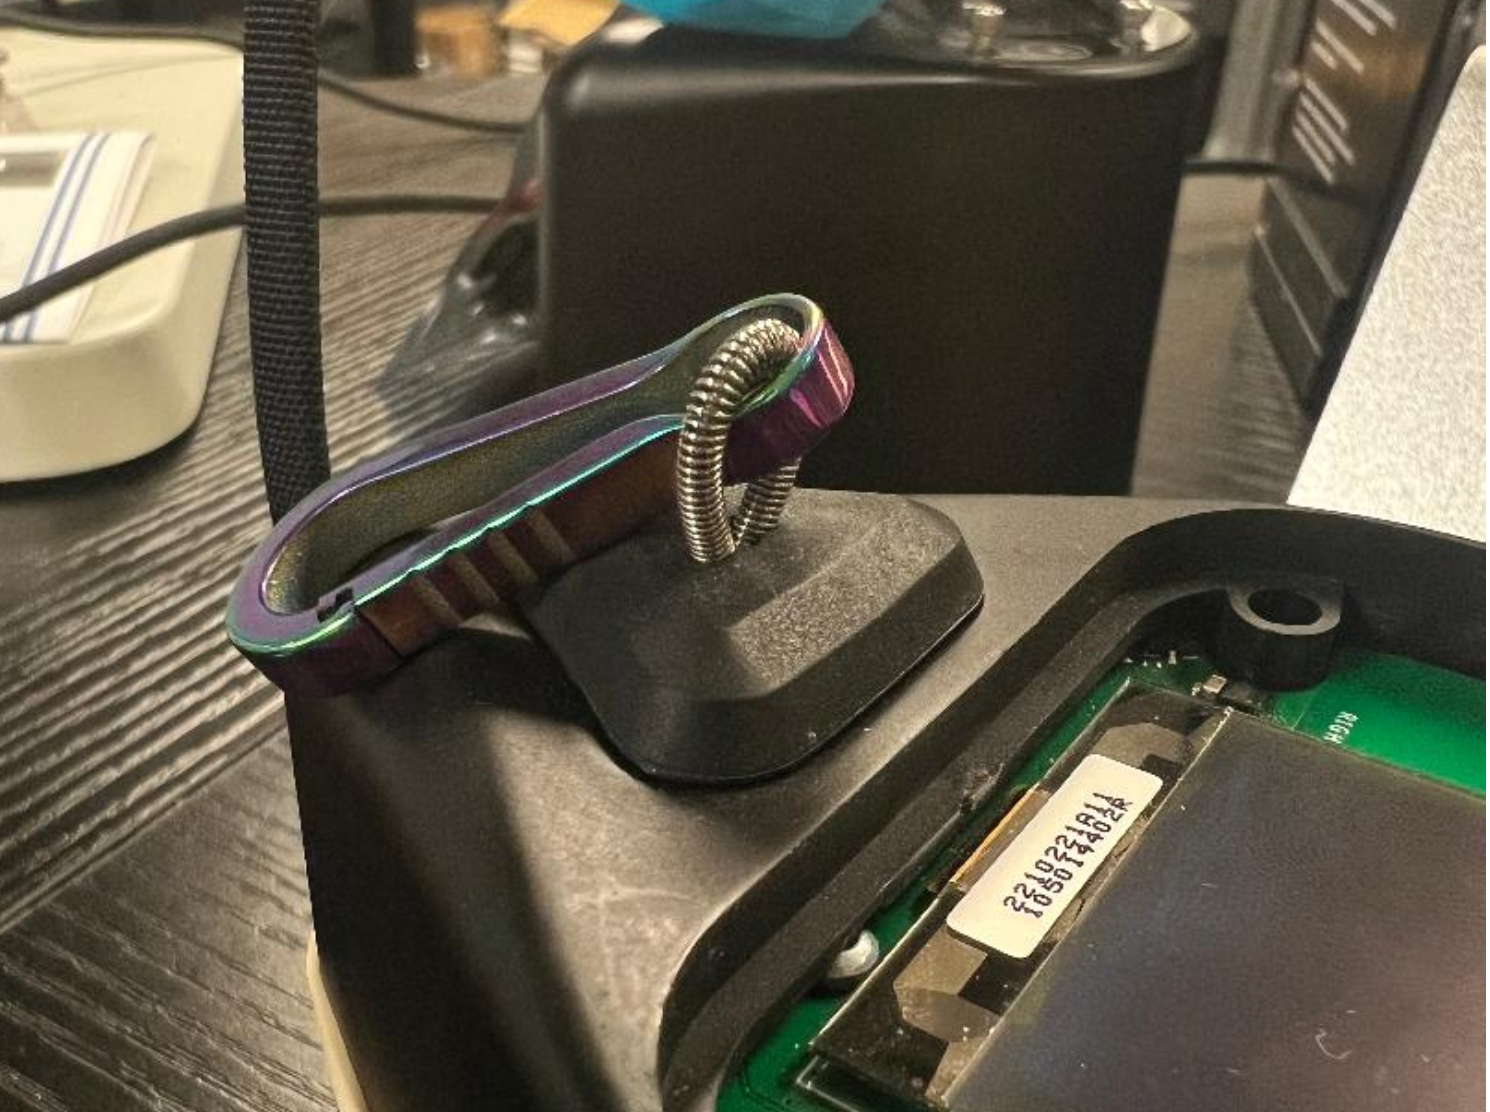
Now you will screw the axle in place while holding the spindle down so it doesn't shift in the process. To pre-tension the tether you will need to put the end of the tether that is covered by the rubber band to the middle, and from there turn the spindle one full revolution to the right. When pre-tensioning the tether it is crucial that the tether makes at least one full rotation to prevent slack at the beginning of the tether. After pre-tensioning, you must hold the spindle to prevent the tether from coming off of the spindle again and then cut the rubber band using scissors or any sharp tool. Be careful not to damage the tether or protectant. You may now insert the tether back into the top chassis, through the coil housing and into the hole of the outer shell. Make sure that you are holding the tether tightly, it is important that you don’t let go of the wire. Once the tether is out of the unit, you may use a clip to hold it in place while you reattach the wires connecting the PCB (green board) to the battery and the switch. Put the wires back into the unit and keep the unit intact. From here, you will put the wire through the rubber stopper. On top of the stopper you will put a double barrel crimp, loop protector and carabiner (in that order). Pull the wire so that it has enough room to be crimped. Place the double barrel crimp, loop protector and carabiner lower down the tether pulled out and put the end of the tether into the empty hole of the double barrel crimp. Ensure that there is no excess wire at the bottom. Using a crimping tool, crimp the barrel with a strong grip. It should look like this:
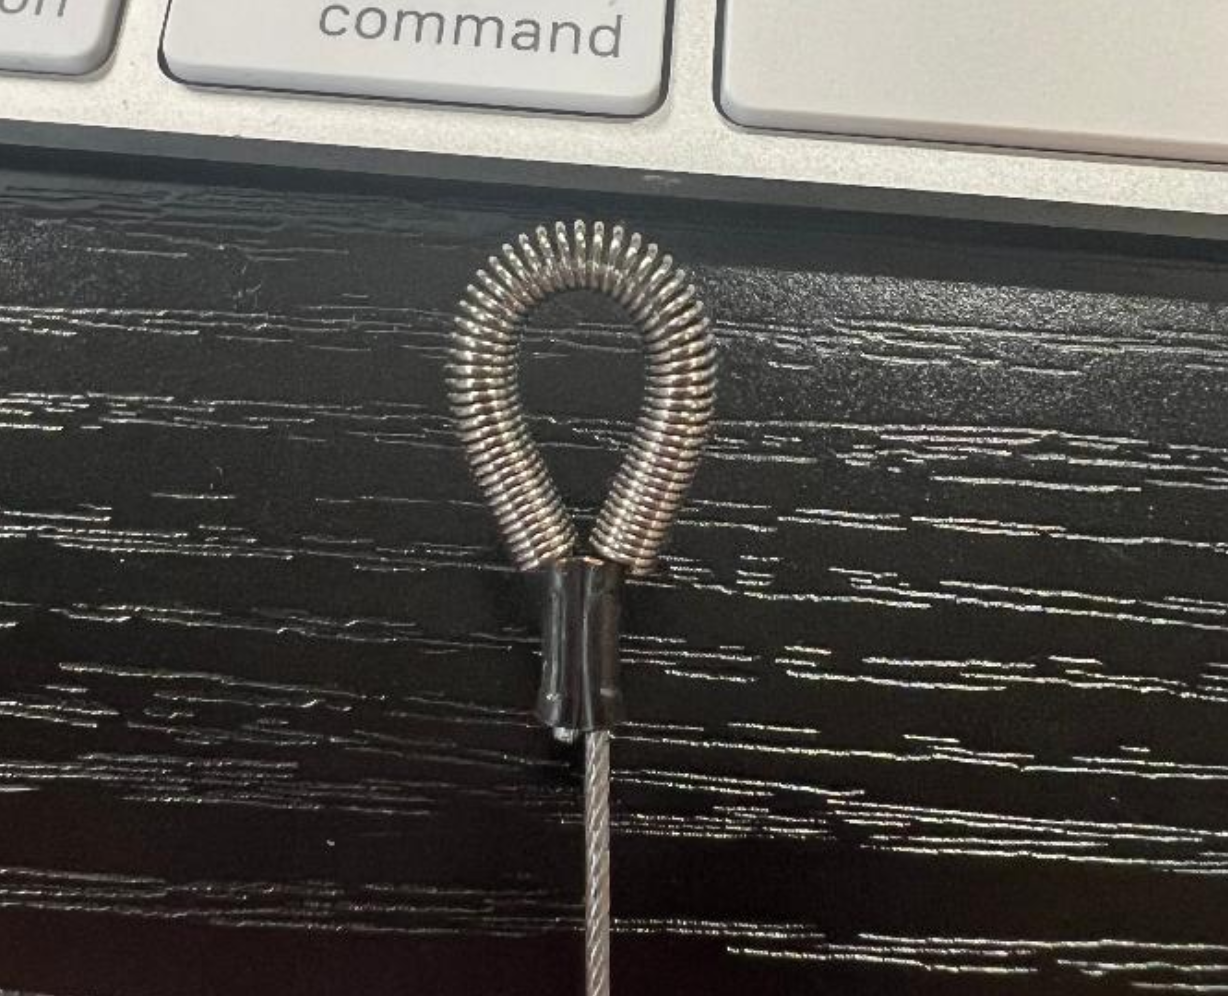
Pull the wire from the bottom of the stopper so that the double barrel crimp does not show. This may take some force. Here is what it should look like after:
Finally, you may close the unit by putting the screen back on and screwing it tightly so that the screen cover is flat.
If the tether is impacting the functionality of your sensor you may be able to have it repaired if it is within warranty.
You can also look into our RepOne Protect Plan or purchase a one time repair.